Quantcast
Channel: Products – Thonk – DIY Synthesizer Kits & Components
Viewing all 2274 articles
Browse latest View live

CLee Yusynth Minimoog Filter 4U PCB + Panel set

$
0
0

Craig writes:

Yves Usson has kindly allowed me to produce a 4U board for his minimoog filter. This is the classic Moog 4 pole (-24db) low pass filter. Serge never made a 4 pole low pass filter and this is a great addition to my synth.

My circuit is the same as Yves design with the exception of my using 2 TL071 op amps where he uses a single TL072. His documentation for the design can be found here.

Build Document and BOM

This PCB will happily work with both +/-12v and +/-15v power supplies.


CLee 8 Channel Quantiser PCB Set

$
0
0

This Quantizer includes 8 independent channels of quantizing which share common SCALE. BANK and HOLD/SAMPLE AND HOLD controls.

You can choose to build only with the Main Board + Programmed Chip.. OR also add on the optional LCD board + Programmed chip. We do not currently have panels available.

Quantizer2<%

Fonitronik Attenuverter Chicklet

$
0
0

You are buying a PCB only, no components are included.

BULK PRICING
| 5-24  – £0.93  | 25+  – £0.83  |
(Bulk prices are ex-VAT (EU Tax) & displayed once items are in your cart)

A PCB for a single attenuvertion channel. Can be used to retrofit CV inputs of built modules with an attenuverter, or with a Thonk VERTER panel you can have 3 channels of attenuvertion in a 4hp Eurorack panel.

The PCB is single sided, 1.4in x .7 in (36mm x 18mm), and accommodates 9, 16, and 24mm alphas and 9mm vishay, too.
Each PCB provides a complete power input filter/decoupling scheme, there are wirepads for the positive and negative rail after the filter, making it possible to use one filter/decoupling section for multiple daisychained PCBs.

Documentation here.

Fonitronik Cascade PCB/Panel

$
0
0

There are two options to build this 4hp 66mm deep eurorack module:

  1. Eurorack Panel – 4hp Aluminium Panel
  2. Full Eurorack PCB Set – Eurorack Panel PCB and Mixer PCB
  3. Mixer PCB Only – For building the mixer in formats other than Eurorack

No parts included – For the full kit including all parts go here.

Cascade_PCB_Info_crop

Cascade_Info

Illustrated Build Document  and Fonitronik Manual – http://www.thonk.co.uk/documents/fonitronik/cascade/

RYO Airtenuator I

$
0
0

The RYO Airtenuator I is a floating passive attenuator you connect between two modules in your rack via patch cables, acting as a volume/modulation depth control between the source and destination.

Instead of being built into a module that sits mounted in your modular case these attenuators “float” in the air held up firmly by the two cables connected to it, thanks to the firm fit it is possible to make precise adjustments one-handed and they can also easily be twisted into an angle that works best for the specific task and placement in your patch.

One handed operation is tested on patch cables from Ad-Infinitum, Erthenvar (standard and IV) and TipTop Stackcables.

The Airtenuator is available as a beginner friendly DIY kit, bare PCB* and also assembled and ready to go.

The production version have black PCB’s.

Download assembly manual here. (1MB)

If we’re out of stock of full kits you can use the B50K or B100K pots from here – http://www.thonk.co.uk/shop/ttpots/

and the PJ302M jacks from here – http://www.thonk.co.uk/shop/3-5mm-jack-sample-bags/

Basic specifications

Length: 58 mm

Width: 16 mm

Power: 0.2 mA @ 10V signal +/-20% from the output jack

Impedance: 50k +/-20% (variable impedance if used backwards)

* Regarding our PCB/panel only offerings, please note that these are mainly offered due to popular demand from the experienced DIY community. Hence we are counting on that you know what you are doing and how to source parts. If you feel the least bit uncertain, please consider going for the kit.

airtenuator12

RYO 3xVCA Kit

$
0
0

A simple and space-efficient voltage controlled amplifier for processing of control voltages as well as audio with high precision and a good clean sound.

This module gives you no less than three fully independant linear VCAs with very similar response between each VCA in the same module or between modules.

The 3xVCA is great for adding extra life and dynamics to CV modulations as well as for regular audio duties such as a good sounding Amplitude Modulation all the way thru the audio spectrum.

This module requires calibration in several steps, achieved precision depends on the precision of your multimeter. It can be calibrated for either 5V or 8V CV. Assembled modules are calibrated to 1.00x gain at 5.00V CV, that means 8.00V CV will give a 1.65x gain.

Kits comes supplied with PCB, front panel (PCB material), component kit, power cable and mounting screws. Solder and tools are not supplied.

Download BOM and calibration instructions here.

Download schematics here.

 Basic specifications

Width: 4hp

Depth: 51 mm.

Power: +12V 26 mA / -12V 21mA


Soulsby miniAtmegatron

$
0
0

case-iso-transparent

This is a full kit which includes everything you need to build this standalone 8-bit synth.

  • 8 bit synth kit (PCB and all components)
  • Ready programmed Arduino Uno
  • USB Cable
  • Acrylic Enclosure kit

The miniAtmegatron is a DIY kit shield for the Arduino Uno. It turns the Uno into an 8-bit synthesizer with an audio engine based on the Atmegatron. If you’re a dab hand at soldering and want to dip your toes into the 8-bit ocean, this could be the synth for you! The package comes with instructions, PCB and all the electronic components. The Arduino Uno must be bought separately.built-on-white

Features

Build

  • 0.5 – 1 hour build time, depending on experience
  • Soldering experience recommended
  • YouTube tutorial to help building
  • Once built the shield slots into the top of the Arduino Uno
  • Powered by USB
  • Audio via 3.5mm mono jack

Play

  • 8-bit monophonic MIDI synthesizer
  • Unique Wavetable PWM Synthesis audio engine
  • Controlled via 2 RGB LEDs, 5 buttons and 6 pots
  • Instantly playable using inbuilt sequences or play button
  • A huge number of Atmegatron features in 1 tiny device
  • Save sound to memory for future use

Hack

  • Download the open source code from the downloads page
  • Download the free Arduino development environment
  • Upload the source code to the Arduino Uno and it’s ready to play!
  • Tutorials and forums to help programmers
  • MIDI hack your Arduino Uno and the miniAtmegatron becomes a MIDI instrument

Specification

Synthesizer
16 waveforms LFO with 16 waveforms MIDI clock sync (if Uno MIDI-hacked)
15 digital filter algorithms Filter and pitch envelope modulation Sequence player with 15 sequences
2 Envelopes with 16 preset shapes Pitch and phase LFO modulation 8 Wavecrusher or Portamento presets
1 memory patch Filter, amplitude and pulse width LFO modulation Phaser and distortion fx
Inputs/Outputs Extras
3.5mm mono jack Assembly and operation instructions
Power via Arduino USB Pre-MIDI-hacked Arduino available

Synthesis Engine

The miniAtmegatron synthesis engine is based on the Atmegatron engine, with some features cut back or removed because of the simpler interface. Like the Atmegatron, the mini uses the PWM output of the Atmega328P processor.
To find out more about the synthesis engine, see the Atmegatron page.

RYO VC Sequencer + TrigXpander Kit

$
0
0

A compact 8-step sequential voltage source in 10hp, with optional 4hp trigger output expander. It works great as a classic 8 step sequencer, but also has a CV addressed mode for more experimental & stochastic results. A further expander to be released later in the year will allow two modules to be chained as a single 16 step sequencer.

RYO kits are extremely user friendly with detailed build manuals and individually bagged and labelled components.

  • Classic forward/backward operation using a clock
  • Pattern based sequencing  using control voltage levels scaled to each step of the sequencer, this allows the CV waveform you feed it with to determine the running pattern. e.g. a ramp to make it go forward, saw to go backward, triangle for pendulum, S&H’d noise for random etc.
  • You could also use another sequencer’s pattern to control the pattern of the VC Sequencer, the possibilities for exploration are many.
  • All low latency CMOS and Opamp circuitry. No software, firmware, PIC chips, ATMEGAs, micro processors etc.
  • Works up to audio rates. The VC Sequencer therefore functions as a 3 bit hands on waveshaper.

COMING SOON – Expanders to allow chaining of 2 VC Sequencers for 16 step operation and unlimited extra parallel channels of CV or gate/trig.

Kits comes supplied with PCB, front panel (PCB material), component kit, knobs, power cable and mounting screws. Solder and tools are not supplied.

Seq Width: 10hp

TrigXpander Width: 4hp

Depth with power cable attached: Less than 45 mm for both modules.

Power: +22 mA / -11 mA

Sequencer Power: +12mA / -0mA

TrigXpander Power: +12mA / -0mA

 Build Manual

For support – Build thread on Muffwiggler forum


RYO Paths – Full kit

$
0
0

PATHS – A Cycling Sequential Switch

A 4:4 cycling sequential switch, featuring simultaneous forward/reverse stepping, hold, reset, and an additional voltage controlled mode based on the same design as our VC Sequencer. Also on board are push buttons for each function enabling you to play and perform the switching with a more human input.

This sequential switch will do all your standard 1>2, 1>3, 1>4 or the other way around with great real-time as well as external voltage controllability.

But its when you start playing around with multiple sources and destinations that things start getting fun and weird! You could for instance shuffle around four different trigger patterns to trigger four different percussive generators for interesting variations, or why not 4 oscillators shuffling between 4 different destinations, panned and processed in various ways?

Whatever your sequential switch application might be, we’re confident the Paths is up to the task!

Just like the VC Sequencer it is clockable by very high clock rates and CVable with full audio range. All for your experimental waveshaping duties.

In CV mode there is two CV inputs. The one that shares the reverse clock input is full wave rectified and the one that shares the forward clock input is half wave rectified. It uses an active rectifier without voltage drop or a dead zone around 0V. The steps toggle switch and the red buttons are inactive in CV mode.

When I/O1 is connected to O/I1, I/O2 is connected to O/I2 and so on.

When I/O1 is connected to O/I2, I/O2 is connected to O/I3 and so on, and I/O4 is connected to O/I1.

When I/O1 is connected to O/I3, I/O2 is connected to O/I4 and I/O3 is connected to O/I1 and so on.

All the routings can be seen in the picture linked here.

Kits comes supplied with PCBs, front panel (PCB material), component kit, power cable and mounting screws. Solder and tools are not supplied.

Recommended Retail Price in SEK excl. VAT/sales tax.

SEK 999 for the DIY kit (Convert to EUR, USD, GBP)

Price for PCB*/Panel only and assembled TBA.


Download assembly instructions and BOM here (2.7MB).

Download schematics here.


Basic specifications

Width: 8 hp

Depth: 46 mm.

Power: +12V 30 mA / -12V 8 mA


Fonitronik Cascade Full Kit

Mutable Instruments CVpal Kit

$
0
0

Do-it-yourself USB MIDI interface, 4hp Aluminium panel.

Kit includes everything you need, with a pre-programmed chip.

Mutable Instruments dreamt of a really simple DIY kit – so simple that it would allow beginners to enter the world of DIY with a big smile – and yet, interesting enough to be useful in any kind of Eurorack setup. That’s how the CVpal was born! The kit contains only 25 parts to solder; but is an incredibly useful tool allowing you to connect your computer or iPad/iPhone (with camera connection kit) to your modular system or (neo-)vintage analog equipment.

The CVpal features a large palette of control modes – monophonic with velocity and extra square oscillator, monophonic with clock outputs, duophonic, dual monophonic, or even quad trigger conversion! Its 12-bit DAC with an 8-point software calibration curve makes it more accurate than more expensive products.

  • Entry-level, fool-proof, DIY kit (only 25 parts to assemble)
  • Plenty of modes (mono CV/Gate/Velocity/Square digital oscillator ; duophonic and dual channel modes ; 4 note trigger conversion ; CC to CV conversion…)
  • Digital calibration provides better accuracy than offset/scale trimmers
  • USB-powered
  • Gates are +5V  CV’s are +4V
  • 1ms latency on OS X and Linux, 8ms latency in Windows
  • 40 mm Depth

Compatibility

The CVpal is class-compliant but uses an usual USB setting (1ms poll-rate in low-speed mode) not well supported on Windows.

Optimal latency is obtained with OS X >= 10.6.3 ; iOS ; or Linux >= 2.6.

On other systems, the CVpal will work but messages will be delayed by up to 8ms.

Conversion modes

  • Monophonic with velocity
  • Monophonic with velocity and square oscillator
  • Dual monophonic
  • Duophonic
  • CC conversion
  • Monophonic with CC
  • Quad triggers
  • Quad gates
  • Monophonic with MIDI clock output

Technical characteristics

Range and standards:

  • CV outputs: 0 to 4V, V/Oct (4 octaves).
  • Gate outputs: Positive V-trig, ON = 5V ; OFF = 0V.

Performance:

  • Resolution: < 2mV.
  • 8 points calibration curve for non-linearity compensation.
  • Temperature dependency: +/- 2 cents within the 10° C to 80° C range.
  • Output impedance: 220Ω (rule of thumb: 2 cents drop per connection to a CV input).

Power supply:

USB-bus powered, current draw < 20mA.

http://mutable-instruments.net/modules/cvpal

More…

Assembly instructions

Specifications

User manual

CVpal on Modular Grid


Horstronic Joystick – Full DIY Kit

$
0
0

This is full DIY Kit to build a Horstronic 14hp Joystick module. There is no build doc provided, but it has a BOM, good photos (linked above) and a build thread on Muffwiggler.

The joystick can output X and Y axes of CV, so can control two different CVs at once. It can either be used to scale/offset/attenuate incoming signals OR to generate control voltages without any input purely on the position of the Joystick.

The joystick is sprung so it always returns to centre, but this can be removed so the stick stays stationary and holds it’s position.

It not only has a CV output per channel but also an input. Depending on the position of the unipolar/bipolar switch (labelled + and +/-) you can use the joystick to alter the signal from nothing to full on in + mode or from inverted to 0 (in middle position) to full on in +/- mode.  Both channels also have an offset and a scale potentiometer which gives you the ability to offset the signal from -5V to +5V or scale it from inverted to full on before going through the joystick.

BOM – joystick-bom-0-9b-1

Build Thread – click here

God’s Box ‘Humpback’ Filter. FULL DIY KIT

$
0
0


hump_34
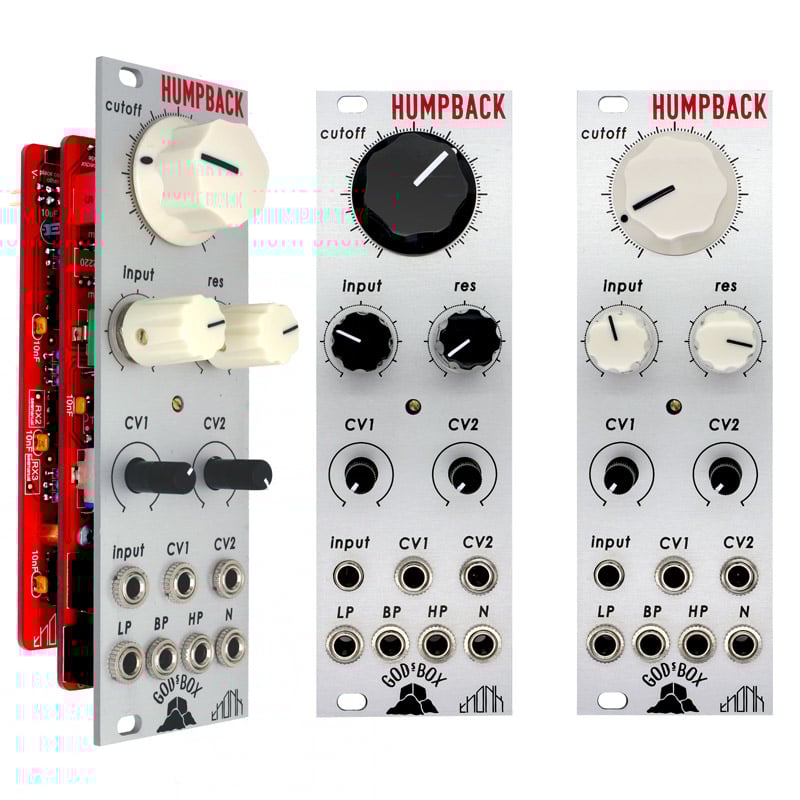
The God’s Box ‘Humpback’ kit is produced exclusively in collaboration with Thonk.

This kit includes everything you need to build the module apart from tools and solder. The module is 8hp wide and is skiff friendly; 38mm deep. The kit is packed to the same high standards customers have come to expect from all Thonk kits.

Contents

  • Aluminium 8hp Eurorack panel – High Quality two colour Aluprint process
  • Red PCBs with ENIG gold traces
  • All electronic components required including matched transistor pair
  • Genuine and new/unused Rochester CA3080AE chips
  • Knobs, power cable, M3 rack screws

Description

The Humpback multimode voltage controlled filter is a 2-pole, CA3080 based implementation of the classic state variable architecture. The controls of the filter are as follows:

  • Filter cutoff – a hardwired DC voltage frequency control
  • CV inputs – two frequency CV inputs are included on the panel and controlled by attenutators.
  • Outputs – lowpass, bandpass, highpass and notch are available simultaneously
  • Signal input – one signal input is available on the panel
  • Resonance-resonance control is included and is hot-rodded to allow self-oscillation. In self oscillation the filter will produce a sine wave output.

Build Documentation

BUILD DOChttp://thonk.co.uk/documents/gbox/humpback/ 

Muffwiggler Build thread – https://www.muffwiggler.com/forum/viewtopic.php?p=1949692

Fonitronik Attenuverter Chicklet

$
0
0

You are buying a PCB only, no components are included.

BULK PRICING
| 5-24  – £0.93  | 25+  – £0.83  |
(Bulk prices are ex-VAT (EU Tax) & displayed once items are in your cart)

A PCB for a single attenuvertion channel. Can be used to retrofit CV inputs of built modules with an attenuverter, or with a Thonk VERTER panel you can have 3 channels of attenuvertion in a 4hp Eurorack panel.

The PCB is single sided, 1.4in x .7 in (36mm x 18mm), and accommodates 9, 16, and 24mm alphas and 9mm vishay, too.
Each PCB provides a complete power input filter/decoupling scheme, there are wirepads for the positive and negative rail after the filter, making it possible to use one filter/decoupling section for multiple daisychained PCBs.

Documentation here.

4ms QPLFO Kit – Quad Pingable LFO

$
0
0

This is a full kit which includes all required parts.

The Quad Pingable LFO is a compact, playable four-channel tap-tempo, clock-syncable LFO with variable skew and reset.

The QPLFO is designed to be useful in small portable systems that require maximum functionality in minimal space, as well as large systems that need maximum modulation sources.

Basic features

  • Quad “pingable” LFO’s — frequency is set by time between pulses (“ping”)
  • Each of the 4 channels is an independent LFO
  • Can produce a variety of waveshapes: “Pluck,” to ramp-down, to triangle, to ramp-up, and all shapes in between
  • Channels can easily modulate, trigger, and reset each other for complex and slowly morphing outputs
  • Slowest period is about 71 minutes (0.0002 Hz), fastest speed is about 500Hz (marginal tracking up to 1kHz)
  • Tap tempo button is free-running (LFO runs indefinitely), but external clock/Ping is auto-stopping (LFO stops when external clock stops)

Controls and jacks

  • Tap tempo button (“Ping”) for manually setting the tempo
  • Ping jack sets tempo with an external clock (any complex signal can be used as a clock)
  • On/mute button enables or mutes the output (latching button)
  • Skew knob and CV jack control the waveshape by altering the ratio between rise and fall times
    • At 0% Skew (0V of CV), the shape is a “plucky” near-expo curve
    • At 1% Skew (just over 0V of CV), the shape is ramp-down
    • At 50% Skew (about 5V of CV), the shape is a triangle
    • At 100% Skew (about 10V of CV), the shape is ramp-up
    • Skew knob provides offset to the incoming CV signal, so any range of CV is acceptable
  • Reset jack restarts the LFO without changing the tempo (rising edge triggered)
  • OUT jack outputs either a 0 to 10V waveshape, or a -5V to +5V waveshape (jumper selectable)
  • LED flashes and dims to the signal on the OUT jack
  • Tap tempo button flashes to the internal tap-tempo clock or to incoming pulses on the Ping jack
  • On/Mute button lights up when channel is On

Advanced

    • Ping and Reset inputs use comparators, so any waveshape can be used for triggering (audio waves, complex LFOs, even the QPLFO itself!)
      • Trim-pot on PCB allows for adjustment of comparator threshold value
    • “Fire-on-unmute” jumper per channel:
      • When this optional jumper is installed, pressing the On button to turn the channel on will reset the LFO.
      • If the jumper is not installed (factory default), pressing On will unmute the LFO without resetting (LFO runs in the background when muted)
    • Bipolar/Unipolar jumper:
      • Setting jumper to Bipolar makes the outputs -5V to +5V
      • Setting jumper to Unipolar makes the outputs 0V to +10V
      • One jumper controls all four channels
    • One-shot mode: Reset jack can be used to trigger a one-shot envelope if the external ping clock is stopped. See manual for detailed discussion
    • Floating Reset mode: Holding a high gate on Reset jack allows the waveshape to run freely without automatically re-syncing to the ping clock. A bare cable plugged into the jack causes a high gate
  • Connects to other modules using ribbon cables:
    • Outputs can connect to the 4ms VCA Matrix, or the 4ms SISM, or the Toppobrillo Mixiplexer
    • Normalization of ping jacks can connect to the 4ms Quad Clock Distributer

Module size:
The QPLFO is 12HP and 1.57 inches (40mm) deep.

Power consumption:
A jumper selects using +5V from the power supply, or generating +5V on-board from the +12V rail.

  • +12V rail:
    • 89mA max with jumper selecting external 5V
    • 154mA max with jumper selecting internal 5V.
  • +5V rail:
    • 65mA max with jumper selecting external 5V
    • not used (0mA) with jumper selecting internal 5V.
  • -12V rail:
    • 73mA max

Build document here – http://www.4mspedals.com/kits.php#QPLFO


4ms SCM Kit – Shuffling Clock Multiplier

$
0
0

This kit contains everything you need to build a 4ms SCM. You need to build this yourself, this is not a finished module.

This is an intermediate-level kit. You should be confident in your soldering skills, and have a basix familiarity with electronic components.

The SCM is an ingenious clock multiplication device with very funky shuffle and slip features.

Documentation

Build Guide

Parts Image


scm_pcb

4ms SCM Breakout Kit – Shuffling Clock Multiplier Expander

$
0
0

This kit contains everything you need to build a 4ms SCM Breakout, this is an expander module for the SCM, it does nothing unless connected to an SCM.
You need to build this yourself, this is not a finished module.

This is an intermediate-level kit. You should be confident in your soldering skills, and have a basix familiarity with electronic components.

The SCM breakout adds even more functionality to the ingenious SCM module.

Documentation

http://www.4mspedals.com/kits.php#clocker

4ms PEG Kit – Pingable Envelope Generator

$
0
0

This kit contains everything you need to build a 4ms PEG. You need to build this yourself, this is not a finished module.

This is an intermediate-level kit. You should be confident in your soldering skills, and have a familiarity with electronic components.

The Pingable Envelope Generator (PEG) is a dual envelope generator whose envelope lengths are set by incoming clocks or “pings”.

The PEG has full CV control of envelope shape, skew, and ping (clock) division/multiplication, as well as a plethora of triggering and cycling options (AD, AR, quantization, cycle), and a tap tempo button for each channel.

Documentation

All 4ms Kit build documentation can be found here


Music Thing Modular – Turing Machine Expander VACTROL MIX Kit

$
0
0

A full kit to build the VACTROL MIX expander for the Turing Machine MK i and MK ii. This module will not function without a Turing Machine attached.

Vactrol Mix combines four audio or CV signals into two channels, determined by the random sequence. It’s a great way to create stereo effects, complex waveforms or feedback loops.

You cannot connect this to a Turing Machine MK I without a BACKPACK kit! You may need to up-rate your backpack positive rail fuse to support Vactrol Mix, Pulses AND Voltages expanders.

This kit includes everything you need to build a fully functioning expansion module apart from the tools and solder.

Thonk build documentation is here – http://www.thonk.co.uk/Documents/Turing/expanders/

Music Thing Modular documentation is here – https://github.com/TomWhitwell/TuringMixExpander

  • Front panel (Aluminium 10hp)
    • VACTROL MIX
  • PCB (Blue, gold plated traces)
    • VACTROL MIX
  • All electronic components required.
  • All mechanical components, pots (metal shaft), jacks, headers etc.
  • Ribbon cable for connection to BACKPACK module.
  • Black Davies 1900h clone knobs
  • Rack screws


This module does nothing unless attached to a Turing Machine and BACKPACK module. They are compatible with all versions of the Turing Machine, past and future.

This product is sold under our standard Terms and Conditions.

Music Thing Modular – Turing Machine Expander VOLTAGES Kit

Viewing all 2274 articles
Browse latest View live